
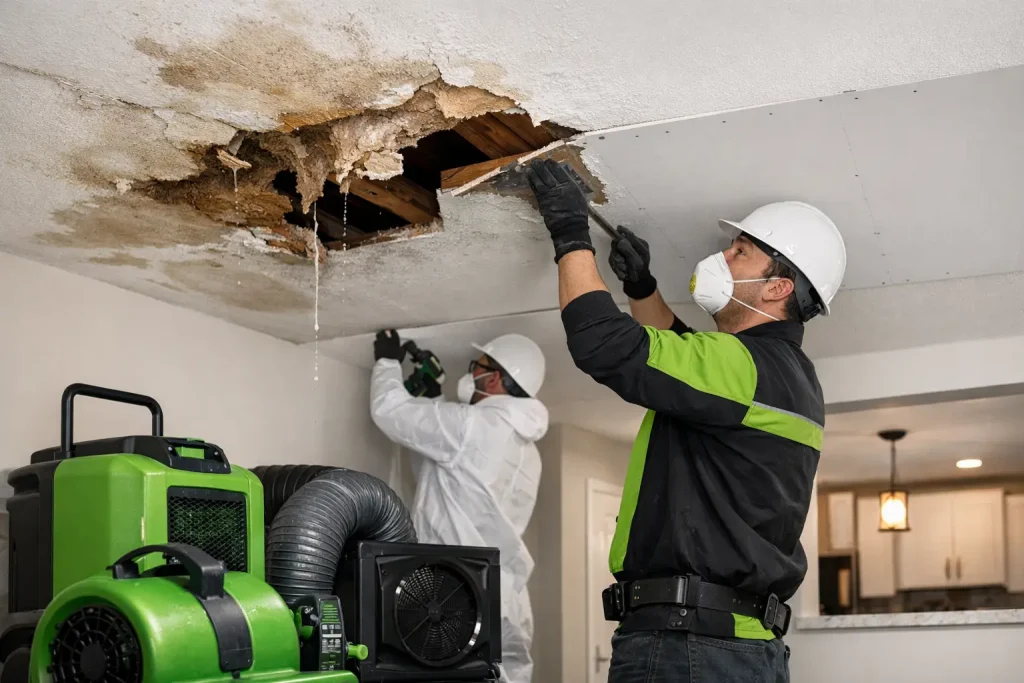
A brown ceiling stain rarely stays just a stain. What looks minor at first can turn into wet insulation, damaged drywall, hidden mold growth, and in some cases a ceiling that begins to sag or fail. That is why water damage ceiling repair should start with the source of the leak, not just the visible mark overhead.
For homeowners and property managers, the biggest mistake is treating ceiling damage as a cosmetic issue. Paint can hide discoloration for a short time, but it will not stop active moisture, trapped water, or structural deterioration. The right repair process protects the building, documents the loss properly, and reduces the chance of a second round of damage a few weeks later.
Why ceiling water damage gets worse quickly
Ceilings often show the problem after water has already traveled through roofing materials, attic spaces, upper-floor plumbing, HVAC lines, or bathroom fixtures. By the time a spot appears, moisture may have spread beyond the visible stain. Drywall absorbs water, insulation holds it, and wood framing can stay damp longer than expected.
This is where timing matters. If the leak is active, the material can continue weakening. A soft spot may become a bulge, and a bulge can eventually open up. In multi-unit buildings or commercial spaces, water can also move laterally and affect lighting, mechanical systems, flooring, and wall cavities below.
Not every ceiling leak is an emergency at the same level, but some clearly are. If you see sagging drywall, dripping around electrical fixtures, spreading discoloration, or repeated staining after earlier repairs, the issue needs immediate evaluation. The same applies after storms, roof failures, burst pipes, or overflows from an upper level.
Water damage ceiling repair begins with the cause
A proper repair starts with identifying where the water came from and whether it is still entering the property. That source may be a roof leak, plumbing line, appliance supply line, drain issue, HVAC condensate problem, or a bathroom overflow from the floor above. In some cases, more than one condition is involved.
This step cannot be skipped. If the cause is not corrected first, the ceiling repair is only temporary. A patched area may look finished, but moisture will return and damage the same section again. For insurance-related losses, documenting the source and extent of damage is also important for claim handling and repair scope.
Moisture inspection tools help confirm how far water has traveled. Surface readings alone do not always tell the full story, especially when insulation or framing above the ceiling remains wet. Thermal imaging and moisture mapping can help define the affected area, which is especially useful when the visible stain is smaller than the actual moisture footprint.
What the repair process usually involves
The right approach depends on the amount of water, how long materials stayed wet, and what is above the ceiling. A small, clean-water incident caught quickly may require limited opening, drying, patching, and painting. A larger or older loss may involve containment, removal of unsalvageable materials, structural drying, insulation replacement, and reconstruction.
1. Stabilizing the area
If the ceiling is actively leaking or sagging, the first priority is making the area safe. Water may need to be controlled, contents moved, and vulnerable finishes protected. If light fixtures, fans, or electrical components are involved, the area may require additional precautions before any opening or demolition begins.
2. Removing damaged materials when needed
Drywall does not always have to be removed, but it often does when it has lost integrity, remained wet too long, or shows clear signs of swelling, softness, or contamination. Insulation above the ceiling may also need replacement because wet insulation loses performance and can slow the drying of surrounding materials.
This is one of those situations where it depends. A minor leak discovered early can sometimes be dried successfully with minimal removal. A repeated leak or a long-standing roof issue usually calls for more invasive opening because hidden moisture tends to remain trapped.
3. Drying the structure properly
Drying is not the same as letting the area sit for a few days. Professional drying uses air movement, dehumidification, and moisture monitoring to bring materials back to acceptable levels. Without verification, it is easy to rebuild too early and trap moisture behind new finishes.
4. Rebuilding the ceiling
Once the cause is fixed and the area is dry, reconstruction can begin. That may include drywall installation, taping, finishing, texture matching, primer, and paint. In some properties, the repair also involves trim, insulation, framing corrections, or repainting larger sections so the finish blends properly.
When a ceiling can be repaired versus replaced
Property owners often ask whether the damaged section can simply be patched. Sometimes it can. If the affected area is limited, the drywall remains structurally sound, and moisture exposure was brief, a localized repair may be enough.
Replacement is more likely when the ceiling is sagging, the drywall has crumbled or softened, the stain has spread over time, or the water source involved contamination. Ceiling texture also matters. Smooth ceilings are usually easier to patch cleanly. Older textured ceilings may require a wider repair area to achieve a consistent appearance.
In older buildings, repairs may also involve additional considerations if suspect materials are present. That is one reason restoration work should be evaluated carefully before demolition begins.
Common causes behind ceiling leaks
Roof failures are a major cause, especially after wind-driven rain, missing shingles, flashing failure, or aging roof systems. In cold weather, ice-related roof issues can also force water inward. Plumbing problems are another frequent source, including leaking supply lines, failed fittings, drain line issues, and tub or shower overflows from an upper floor.
HVAC systems can also be responsible. Clogged condensate lines, air handler leaks, and poor drainage around equipment often create ceiling staining that is mistaken for roof damage. In commercial properties, rooftop units and piping penetrations deserve close attention because water can travel a surprising distance before it appears indoors.
The visible damage does not always point directly to the source. Water follows gravity, but it also follows framing, pipes, ductwork, and low points. That is why the origin should be verified instead of assumed.
Insurance and documentation matter more than many owners realize
If the ceiling damage is tied to a sudden covered loss, careful documentation can make the process smoother. Photos, moisture readings, damage mapping, and a clearly defined repair scope help establish what was affected and why certain materials need removal or replacement.
This is especially important when the damage extends beyond paint and drywall. Wet insulation, affected flooring below, damaged light fixtures, and related reconstruction work can all be part of the loss. For property managers and commercial clients, organized reporting also supports tenant communication, maintenance records, and claim coordination.
Apollo Construction & Renovation Corp. regularly works with property owners through mitigation, documentation, reconstruction, and insurance-related restoration so repairs move forward with less confusion and fewer handoff issues.
Why quick cosmetic fixes often fail
The temptation to repaint the stain and watch it for a while is understandable. The problem is that discoloration is usually just the symptom. If moisture remains above the ceiling, the stain returns, the drywall continues to weaken, and mold growth becomes more likely.
Even when the leak has stopped, stain-blocking paint should come after drying and proper repair, not instead of it. The same goes for patching a hole without addressing wet insulation or the plumbing defect above. Shortcuts save time only until the next leak opens the same area back up.
What to do as soon as you notice ceiling water damage
Start by limiting further damage if you can do so safely. Move furniture, protect floors, and contain drips. If water is near lighting or electrical fixtures, avoid taking risks around energized components. Then arrange for the source to be inspected and the affected area to be evaluated for moisture spread.
If the ceiling is bulging, actively dripping, or showing signs of collapse, treat it as an urgent condition. The same urgency applies after storms, major plumbing failures, and commercial losses where water may continue affecting occupied space.
A fast response does more than improve cleanup. It often reduces demolition, protects adjacent materials, and shortens the overall repair timeline.
Choosing the right repair partner
Ceiling leaks sit at the intersection of mitigation and reconstruction. The best outcome usually comes from a contractor that can manage both sides of the job – stopping the damage, documenting the loss, drying the structure, and rebuilding the finished surface correctly.
That matters because ceiling damage is rarely just a drywall issue. The repair may involve roofing, plumbing, insulation, paint, electrical coordination, and claim documentation. When those pieces are fragmented across multiple vendors, delays and scope gaps become more common.
If your ceiling shows staining, sagging, bubbling paint, or a soft spot overhead, act before the damage spreads. The right repair is not just about making the ceiling look normal again. It is about making sure the leak is resolved, the structure is dry, and the space is restored with confidence.
Every property and insurance policy is different. Contact Apollo to discuss the work your property may need; your insurer determines coverage.