
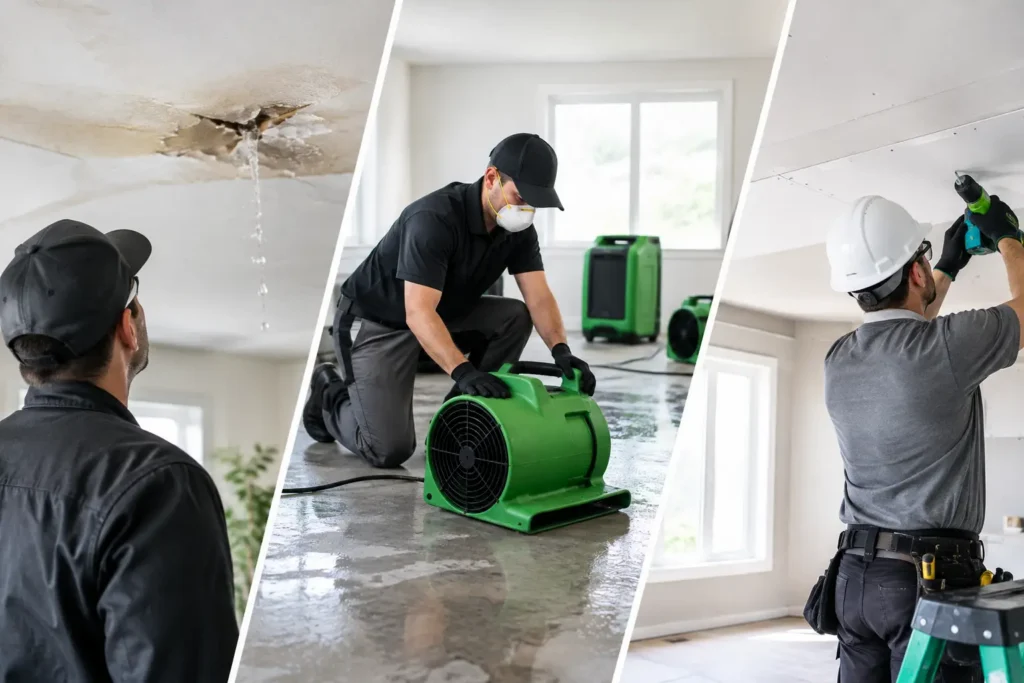
A water stain on a second-floor ceiling can represent far more than a drywall repair. In this water damage rebuild case study, a concealed plumbing failure affected finished living space across two levels, requiring immediate mitigation, detailed documentation, and a carefully managed reconstruction plan. Project details have been generalized to protect the property owner’s privacy, but the workflow reflects the decisions that matter after a covered water loss.
The owner first noticed a soft area in the ceiling below an upstairs bathroom. The visible stain was relatively small. Behind the ceiling, however, moisture had traveled along framing, insulation, and the wall cavity before becoming visible. This is one reason prompt professional assessment matters: the water you can see is not always the full extent of the damage.
The Initial Loss: Containing Damage Before Rebuilding
The first priority was to stop the source. A plumbing professional isolated the leaking supply line, preventing additional water from entering the home. The restoration team then assessed the affected bathroom, the ceiling below it, adjacent wall areas, and nearby flooring.
Before any materials were removed, the team documented the condition of the property. This included photographs, 360-degree imaging, moisture readings, thermal imaging, and a room-by-room inventory of affected finishes. This documentation created a clear record for the homeowner and helped support communication with the insurance adjuster.
Thermal imaging can identify temperature differences that may indicate moisture, but it is not a substitute for direct moisture testing. Moisture meters and probing techniques confirmed wet insulation in the ceiling cavity, elevated readings in portions of the framing, and moisture behind a section of wallboard. The flooring in the room below was also evaluated to determine whether water had traveled beneath the finished surface.
Why a Small Leak Can Create a Larger Scope
Water follows gravity, but it also moves laterally through porous materials and along building components. In this case, the leak originated in a bathroom wall and traveled through the subfloor opening around the plumbing line. It then spread into the ceiling assembly below.
Removing only the stained ceiling area would have left wet insulation and potentially affected materials behind. That approach may appear less disruptive at first, but it can delay drying, allow odors to develop, and create conditions that complicate reconstruction. The correct scope depends on moisture findings, material type, the duration of exposure, and whether materials can be dried effectively in place.
Water Mitigation Set the Foundation for the Rebuild
Once the affected areas were identified, the mitigation phase began. Technicians established containment where needed, protected unaffected finishes, and removed materials that could not be reliably dried. In this case, that included wet ceiling drywall, saturated insulation, and limited sections of damaged wallboard.
Air movement, dehumidification, and controlled drying equipment were placed according to the layout and measured conditions of the home. The objective was not simply to make the room feel dry. It was to bring structural materials, such as framing and subflooring, back to an acceptable moisture condition before repairs began.
Daily monitoring mattered. Technicians recorded moisture readings and adjusted equipment as drying progressed. If drying data shows materials are responding as expected, targeted drying may preserve portions of the structure. If readings remain elevated or materials have deteriorated, additional removal may be necessary. Good restoration work is driven by conditions, not assumptions.
The homeowner also needed clear communication during this phase. Drying equipment can be noisy, rooms may be temporarily unavailable, and the demolition process can make a loss feel more serious before it looks better. Explaining what is being removed, why it is necessary, and what happens next helps property owners make informed decisions without feeling left in the dark.
Insurance Documentation and Scope Alignment
For many property owners, the rebuild becomes stressful when the mitigation work ends and questions remain about what insurance will cover. A contractor cannot determine coverage, deductibles, or final claim payment. Those decisions belong to the carrier and policy terms. What a qualified restoration contractor can do is provide organized, fact-based documentation of observed damage, completed emergency services, and the proposed reconstruction scope.
In this case, the documentation package included moisture records, photos before and after mitigation, affected-material notes, equipment logs, and a detailed estimate for reconstruction. The estimate separated emergency mitigation work from repair and replacement work so each phase could be reviewed clearly.
The reconstruction scope addressed ceiling and wall drywall installation, insulation replacement, texture matching, painting, bathroom repairs, and flooring restoration in the lower-level room. The team also reviewed whether matching concerns could affect adjacent finishes. For example, replacing a small area of older flooring may not always produce a satisfactory visual match. Whether additional replacement is approved depends on policy language, availability of materials, and the carrier’s evaluation.
This is where detailed communication can prevent avoidable delays. When an adjuster requests clarification, measurements, photographs, or a revised estimate, a timely response keeps the project moving. The goal is not to inflate the scope. It is to ensure the scope accurately reflects the conditions found and the work required to restore the affected area properly.
The Water Damage Rebuild Case Study: Reconstruction in the Right Order
Reconstruction began only after drying verification confirmed that the remaining structural materials were ready for repair. Starting too early can trap moisture behind new finishes, while waiting without a plan can extend disruption. The right timing is based on documented drying results and a coordinated construction schedule.
The rebuild followed a logical sequence. First, the plumbing repair was confirmed and the opened wall area was prepared. Insulation was installed where required, followed by new drywall. Joints were taped, finished, sanded, and matched to the surrounding wall and ceiling texture. After primer and paint, the team completed flooring repairs and reinstalled trim.
The bathroom required additional coordination because plumbing, wall finishes, and fixtures all met in a compact area. Rather than treating each repair as a separate task, the project manager coordinated the trades so work happened in the correct order. This reduced the risk of reopening completed walls or delaying the final finish work.
Color and texture matching were discussed with the homeowner before painting began. Even when the same paint color is used, age, sunlight, and previous touch-ups can make a repaired area appear different from surrounding surfaces. Sometimes painting a larger wall section or an entire room is the best practical solution. In other cases, a targeted repair is appropriate. The right choice depends on the existing finish, the owner’s expectations, and the approved scope.
Quality Control Before Project Completion
A proper rebuild is more than closing walls and applying paint. Before final completion, the project team inspected drywall finishes, trim alignment, paint coverage, flooring transitions, and fixture operation. The repaired plumbing area was also reviewed for signs of continued leakage.
The owner was given an opportunity to walk through the completed areas, ask questions, and identify any finish concerns. A final walkthrough is an accountability step. It confirms that the work aligns with the agreed scope and that the property owner understands what was completed.
What Property Owners Can Learn From This Loss
The central lesson is simple: mitigation and reconstruction are connected, but they are not the same service. Mitigation protects the structure and stabilizes conditions after the loss. Reconstruction restores the home’s function and appearance after the area is dry and the scope is defined.
Trying to rush directly to cosmetic repairs can create larger problems if hidden moisture has not been addressed. On the other hand, mitigation without an organized rebuild plan can leave homeowners coordinating multiple trades while managing an insurance claim. A full-service restoration contractor helps create continuity from the first moisture reading through the final coat of paint.
If your home or commercial property has experienced a plumbing leak, roof failure, appliance overflow, or another water intrusion event, act quickly. Stop the source if it is safe to do so, avoid using electrical fixtures near standing water, document visible conditions, and request professional assessment. Apollo Construction & Renovation Corp. can help manage mitigation, documentation, insurance restoration coordination, and rebuilding so the recovery process has a clear path forward.
A water loss does not have to become an open-ended disruption. With verified drying, honest documentation, skilled trades, and a disciplined reconstruction plan, the next step can be restoring a space that feels secure, functional, and like home again.
Every property and insurance policy is different. Contact Apollo to discuss the work your property may need; your insurer determines coverage.